
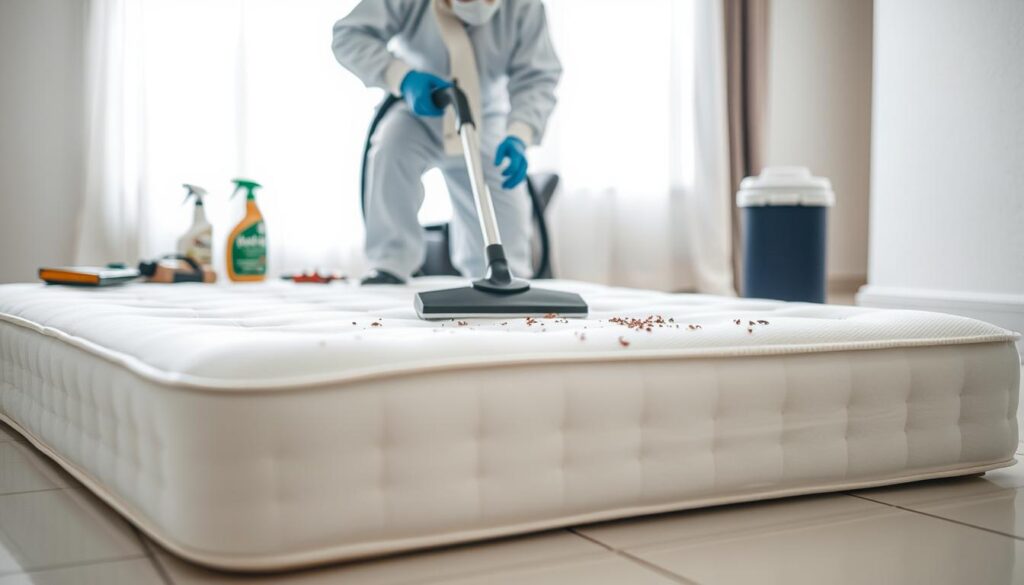
A mattress is one possible hiding site, not the entire infestation. Replacing it immediately can leave activity elsewhere untreated. First ask whether the item can be treated safely and how the surrounding room will be managed; disposal, when necessary, needs measures to prevent spreading bugs.

Identify the places that need attention
Follow infestation evidence and contact routes
Mattress seams
Piping and folds can shelter bugs and infestation evidence.
Bed frame and headboard
Accessible joints may remain active even after bedding is cleaned.
Nearby furniture
The source assessment should extend beyond the sleeping surface.
Moved textiles
Uncontained bedding can transfer bugs while being carried.
Methods ranked by their role
Use preparation, control and monitoring together
Inspection of the whole bed area
Confirm activity and inspect surrounding hiding sites.
Containment and suitable laundry
Bag suspect bedding before moving it and separate cleaned items.
A bed-bug encasement
A properly fitted, intact cover supports management; it does not treat the whole room.
Professional treatment and checks
Use for persistent, widespread or difficult-to-access activity.
Step-by-step management plan
Inspect piping and accessible folds
Use a flashlight without cutting open the mattress. Record suspicious evidence and obtain identification when needed. Avoid assigning the problem solely from skin marks.

Fit and maintain an encasement
Choose a product intended for bed bugs, fit it to the mattress and close the zipper completely. Inspect it for damage and follow the manufacturer and treatment provider’s advice about how long to leave it installed.

Bag bedding before carrying it
Keep suspect textiles contained on the route to laundry equipment. Use suitable treatment within the fabric’s limits and keep cleaned items protected from untreated belongings.

Monitor the bed legs
Install suitable interceptors according to directions and check them regularly. Prevent bedding from creating an alternate route to the floor. Share continued findings with the provider rather than assuming the cover failed.

Sequence and follow-up
Check progress without a clearance promise
Inspect
Examine the mattress, frame and surrounding accessible area.
Prepare
Contain bedding and agree on treatment for each material.
Manage
Fit suitable encasements and use the coordinated treatment plan.
Follow up
Inspect for new evidence and maintain the cover; clearance cannot be guaranteed by a fixed number of days.
Myths and facts
Keep protection claims within their limits
Myth: a new mattress removes every bed bug
Fact: bugs can remain elsewhere in the room.
Myth: any zippered cover is bed-bug-proof
Fact: use a suitable product and maintain its closure and integrity.
Myth: a universal steaming speed suits every mattress
Fact: equipment, material and safety directions vary.
Myth: every pesticide can be sprayed on bedding
Fact: use only sites and methods allowed by the exact label.
What to discuss with a provider
Ask how the pest was identified, which areas will be inspected and which items need preparation. Request written treatment and follow-up instructions that fit the household. Tell the provider about occupants, pets and material-care limitations before work begins. Report continuing evidence with dates and locations so the plan can be reassessed.
Related guides
Whole-home bed bug plan · Reduce bites during treatment · In the house hub
The mattress is only one inspection area
Bed bugs can occupy the frame, headboard, nearby furniture, trim, and adjoining rooms. Discarding or treating only the mattress can leave the infestation in place and make replacement furniture vulnerable.
Preserve a specimen or clear photograph for identification, inspect the surrounding sleeping area, and coordinate treatment. Never apply a pesticide to a mattress unless that exact surface and method appear on the label.
Signs of bed bugs on a mattress: what to look for
Start with a flashlight and inspect slowly around piping, seams, labels and accessible folds. Then check the box spring, frame joints and headboard. Finding evidence in one seam does not show how far the infestation extends. The EPA identification guide describes these clues:
- Live insects: preserve a specimen or a clear photograph for identification rather than relying on size alone.
- Dark spots: possible droppings on fabric or nearby surfaces.
- Rust-colored marks: possible blood staining where insects have been crushed.
- Shed skins and pale eggs: inspect sheltered edges closely; distinguish them from lint and ordinary debris.
Bites are a poor identification test because other insects and skin conditions can produce similar marks. Do not spray an unconfirmed pest problem or cut into the mattress to search. Record the location of each finding so a treatment provider can inspect the same spots.
Vacuuming a bed-bug mattress without spreading bugs
Vacuum accessible seams and the surrounding frame as one part of the plan, not as a stand-alone cure. Avoid scraping or tearing the fabric. Keep the nozzle under control so it does not scatter debris. Follow the machine’s instructions, seal collected waste in a bag and place it in an outdoor trash container. With a bagless machine, plan how to empty and clean the collection chamber without releasing material into another room.
Bag suspect bedding in the bedroom before carrying it to the laundry area. Keep treated textiles in a fresh, clean bag or protected container; putting them back into the original suspect bag can undo the containment step. Do not move uncovered pillows, bedding or a mattress through shared corridors while deciding what to do.
High heat and steam: separate the methods
A clothes dryer treats suitable removable textiles; it does not treat the mattress sitting in your bedroom. EPA preparation guidance recommends a high-heat dryer cycle of 30 minutes for items that can tolerate it and warns that washing alone may not kill bed bugs. Check the care label and avoid overloading so items can tumble. Ask the provider about belongings that cannot safely go into a dryer.
Steam is a different method. EPA DIY guidance calls for steam at least 130°F and cautions against strong airflow that scatters bugs; a diffuser can help. That is not a universal instruction to hold a nozzle against every mattress or soak it. Equipment directions, the manufacturer’s care limits and the ability to reach hiding places matter. Hot air from a hair dryer and improvised room heating are not substitutes for controlled treatment.
Memory foam and pillow-top mattresses need a care check
Foam, layered padding, adhesives and covers can have different moisture and temperature limits. Check the specific manufacturer’s instructions before steaming or using a cleaning product. If safe treatment is uncertain, ask a qualified provider to assess options. Avoid saturating the mattress or closing a damp item inside an encasement. Do not invent a spraying or steaming schedule from the mattress material alone.
Bed-bug encasement versus an ordinary mattress protector
A fitted sheet or waterproof protector is not necessarily a bed-bug encasement. Choose a cover explicitly intended for bed-bug management that encloses the mattress completely, including the underside. Measure its length, width and depth before buying so the fit does not strain the seams or leave loose folds. Check whether the box spring also needs its own suitable encasement.
Close the zipper fully and protect it from damage. Inspect for tears after moving the bed or changing bedding. EPA preparation guidance recommends a sturdy encasement that can remain in place for a year. Follow the product and provider’s instructions; removing it to see whether bugs remain can defeat its purpose. An encasement makes inspection and isolation easier but does not remove bugs from the headboard or surrounding furniture.
Keep or discard an infested mattress?
Do not replace it solely because you found bed bugs. A treatable mattress may be kept within a coordinated plan, while a replacement can become infested if the room remains untreated. Damage that prevents effective encasement, severe contamination or a provider’s assessment may change the decision. Consider whether the item can be handled and managed safely, rather than assuming either disposal or retention is always correct.
If disposal is necessary, agree on containment and local collection arrangements first. Wrap or otherwise contain the item before moving it, clearly identify it as infested and prevent reuse. Do not donate or sell it. Tell the provider about shared access routes in an apartment building so the move does not create another infestation.
Mattress bed-bug questions
Can I remove bed bugs from a mattress overnight?
Cleaning a mattress once cannot establish clearance. Hidden insects elsewhere and untreated belongings can keep the problem going. Use repeated inspection and the agreed follow-up plan instead of an overnight guarantee.
Do interceptors replace mattress treatment?
No. They help monitor movement at suitable bed legs. Keep bedding from touching the floor and avoid alternate routes between the bed and nearby furniture. New findings should inform the wider treatment plan.
Can baking soda or vinegar replace bed-bug control?
Neither is a dependable substitute for identification, containment and a coordinated control program. Do not add household chemicals to bedding or mix them with pesticides. For the rest of the room, follow the whole-home bed-bug guide.
Publishing and affiliate notes
Some product links may be affiliate links. If you buy through them, we may earn a commission at no extra cost to you. Product picks are not lab tests. Read the legal disclaimer.