Removing old wallpaper is one of those home improvement tasks that ranges from surprisingly easy to brutally difficult depending on the wallpaper type, the adhesive used, and how many layers have accumulated. Getting the method right before you start saves hours of frustration. This guide covers 9 proven methods, how to identify your wallpaper type, and what to do with the walls after removal.
Key Takeaways
- Identify your wallpaper type first — strippable, peelable, or traditional — before choosing a method
- Steam is the most effective method for multiple layers and stubborn traditional wallpaper
- Score the wallpaper before applying any water or solution to allow penetration to the adhesive
- Always turn off electricity to the room before any wet removal work
- Prime walls before painting after removal — skipping this step causes uneven paint absorption and poor results
Step 1: Identify Your Wallpaper Type
Before starting, loosen a corner with a putty knife and try to peel. This determines which method to use:
| What Happens | Wallpaper Type | Best Method |
|---|---|---|
| Peels away completely in large sheets | Strippable | Dry stripping — just pull |
| Face layer peels but backing remains | Peelable (2-layer) | Peel face, then wet-strip the backing |
| Barely moves, tears in small pieces | Traditional (paste-on) | Score + wet stripping or steam |
| Multiple layers, very stubborn | Layered / old paste | Steam stripper |
Preparation: Do This Before Anything Else
- Turn off electricity to the room at the breaker and cover all outlets and switches with painter’s tape
- Remove furniture from the room or push to the centre and cover with drop cloths
- Protect floors with plastic sheeting secured with painter’s tape — wallpaper removal creates significant mess
- Fill a large bin liner near you for immediate disposal of stripped paper
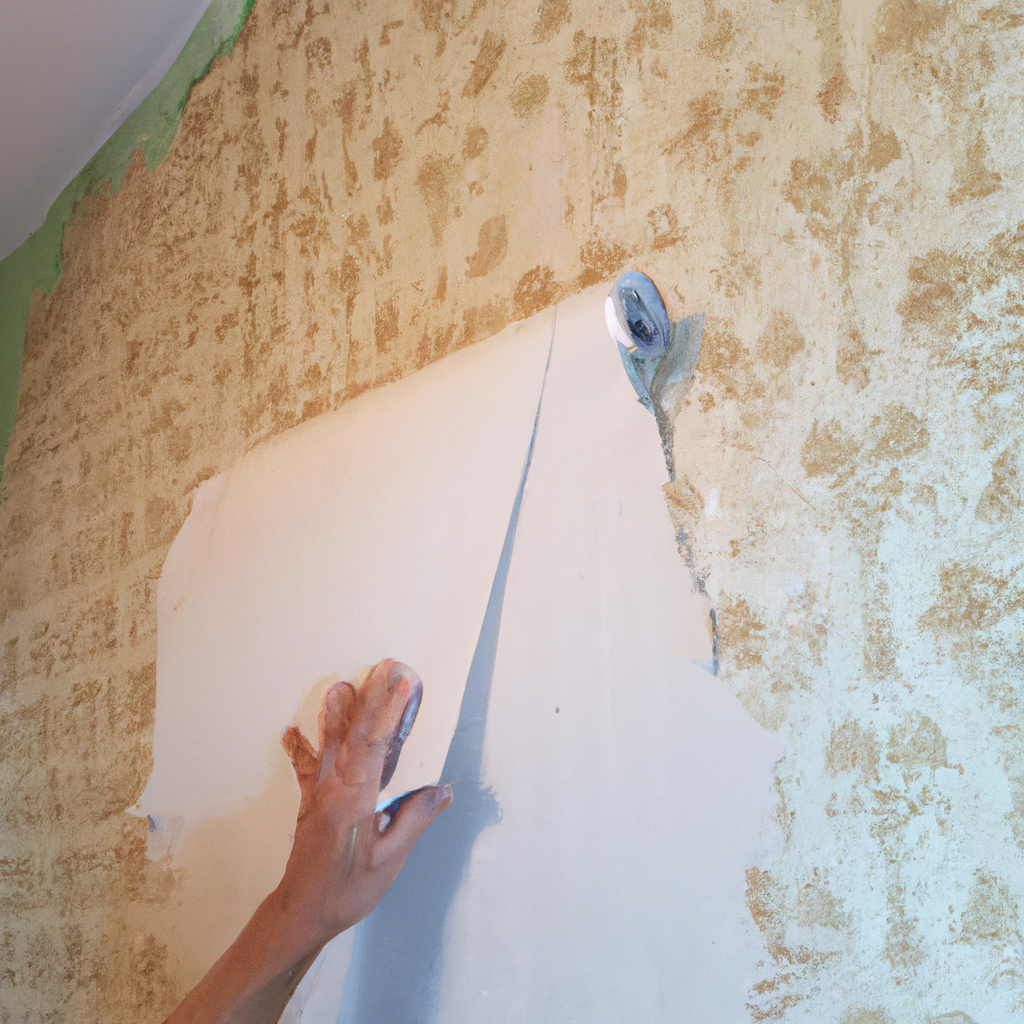
1. Dry Stripping (Strippable Wallpaper)
If you identified strippable wallpaper, dry stripping is the easiest removal job in home improvement. Use your putty knife to loosen a corner or edge seam. Grip the paper firmly and pull at a low 10–20 degree angle slowly — pulling at a steep angle tears the paper. Work in large sheets from seam to seam. Any small tears or remaining backing can be dampened with warm water and scraped off.
2. Scoring (Essential First Step for Traditional Wallpaper)
For non-strippable wallpaper, scoring is essential before applying any liquid. A wallpaper scorer (Paper Tiger is the most popular) rolls across the surface creating thousands of small perforations that allow water or stripper solution to penetrate to the adhesive layer. Apply light, even pressure — pressing too hard damages the drywall or plaster underneath. Score the entire wall area before applying any solution.
3. Hot Water and Fabric Softener Solution
Mix equal parts hot water and fabric softener in a spray bottle or garden sprayer. Spray generously over the scored wallpaper and leave for 10–15 minutes to saturate through to the adhesive. The fabric softener softens the adhesive, making the paper much easier to scrape off. Use a wide scraper or putty knife to remove in sections. Apply more solution to any areas that dry out before you reach them. This is one of the most effective low-cost methods for traditional wallpaper.
4. Warm Water and White Vinegar
Mix 1 part white vinegar with 1 part warm water. Apply with a sponge, spray bottle, or roller after scoring. The acetic acid in vinegar helps break down old adhesive paste. Leave 10–15 minutes, then scrape. This works particularly well on older homes where hide-glue or wheat paste was used as the adhesive. Completely non-toxic and won’t damage plaster walls underneath.
5. Commercial Wallpaper Stripper
Commercial strippers (DIF, WP Chomp) are diluted with water and applied after scoring. They contain wetting agents that penetrate adhesive faster than plain water. Follow dilution instructions on the package. Apply with a sponge or sprayer, wait the recommended time (typically 10–20 minutes), then scrape. Most effective for heavy commercial-grade wallpapers and multiple layers. Use in a well-ventilated room.
6. Steam Stripper (Most Effective for Stubborn and Layered Wallpaper)
A wallpaper steamer is the most powerful removal tool available and worth renting for stubborn jobs (typically $20–40/day from hire centres). Hold the steam plate against the wallpaper for 20–30 seconds per section — the steam penetrates and dissolves the adhesive instantly. Move the plate to the next section and immediately scrape the steamed area while it’s hot. Work in a rhythm: steam one section, scrape the previous. Caution: do not use steam on plasterboard (drywall) for extended periods as it can soften the paper face of the board. Steam is best suited for plaster walls.
7. Handling Special Wallpaper Types
Grasscloth and woven wallpaper: Cannot be wet-stripped as water damages the natural fibres. Use a steamer on low or a heat gun to soften adhesive, then peel carefully. Grasscloth often comes off in strips but leaves significant adhesive residue requiring additional cleaning.
Vinyl-coated wallpaper: Water won’t penetrate the vinyl surface, so scoring is absolutely essential. Score thoroughly before applying any solution. Alternatively, peel the vinyl face layer first, then strip the remaining paper backing with hot water solution.
Wallpaper in old or period houses: Old homes often have multiple layers built up over decades and plaster walls. Use a scoring tool and commercial stripper, working in small sections. A steamer is the most efficient approach. Protect your lungs with a dust mask as decades of dust is released during removal.
8. Removing Adhesive Residue
After stripping wallpaper, adhesive residue almost always remains on the wall. Wipe down with warm water and a sponge while the walls are still damp. For stubborn dried adhesive, apply undiluted fabric softener or a 50/50 vinegar-water solution and scrub with a coarse sponge. Remove all residue before painting or the new paint will bubble and peel. Allow walls to dry fully (24–48 hours minimum) before any painting work.
9. Priming and Preparing Walls After Removal
This is the most commonly skipped step — and the cause of most wallpaper-removal painting failures. After stripping, walls are often damaged (torn paper face on drywall, minor plaster damage, old adhesive patches) and extremely porous. Apply an oil-based or shellac primer before any topcoat to seal the surface evenly. Without primer, paint absorbs unevenly and any remaining adhesive or damage shows through as a patchwork of shiny and matte areas. Fill any holes or gouges with filler before priming.
Tools You’ll Need
- Wallpaper scorer (Paper Tiger)
- Wide scraper or wallpaper stripper blade (6–8 inch)
- Spray bottle or garden pump sprayer
- Large sponge and bucket
- Steam stripper (hire if needed)
- Drop cloths and plastic sheeting
- Rubber gloves and safety glasses
- Bin liners for stripped paper
Frequently Asked Questions
What is the fastest way to remove old wallpaper?
A wallpaper steam stripper is the fastest method for traditional or layered wallpaper. It penetrates and dissolves adhesive immediately, allowing large sections to be scraped off quickly. For strippable wallpaper, dry stripping by hand is actually fastest of all — no tools or solutions required.
Can I use a fabric softener to remove wallpaper?
Yes — a 50/50 hot water and fabric softener mix is one of the most effective natural wallpaper removal solutions. Apply after scoring, leave 10–15 minutes, then scrape. It softens the adhesive effectively and is completely safe for plaster and drywall surfaces.
Do I need to prime walls after removing wallpaper?
Yes — always. Walls after wallpaper removal are damaged, porous, and often have adhesive residue. Without primer, paint absorbs unevenly and underlying damage telegraphs through the topcoat. Apply an oil-based or shellac primer after the walls are fully dry (24–48 hours) before any paint.
How do I remove wallpaper without damaging drywall?
Use light pressure with the scorer to avoid puncturing the drywall face. Don’t over-wet drywall — prolonged water exposure softens the paper face. Steam is better suited to plaster walls than drywall. Work in small sections, keeping the wall damp but not soaked, and use a wide scraper at a very shallow angle to avoid gouging.