
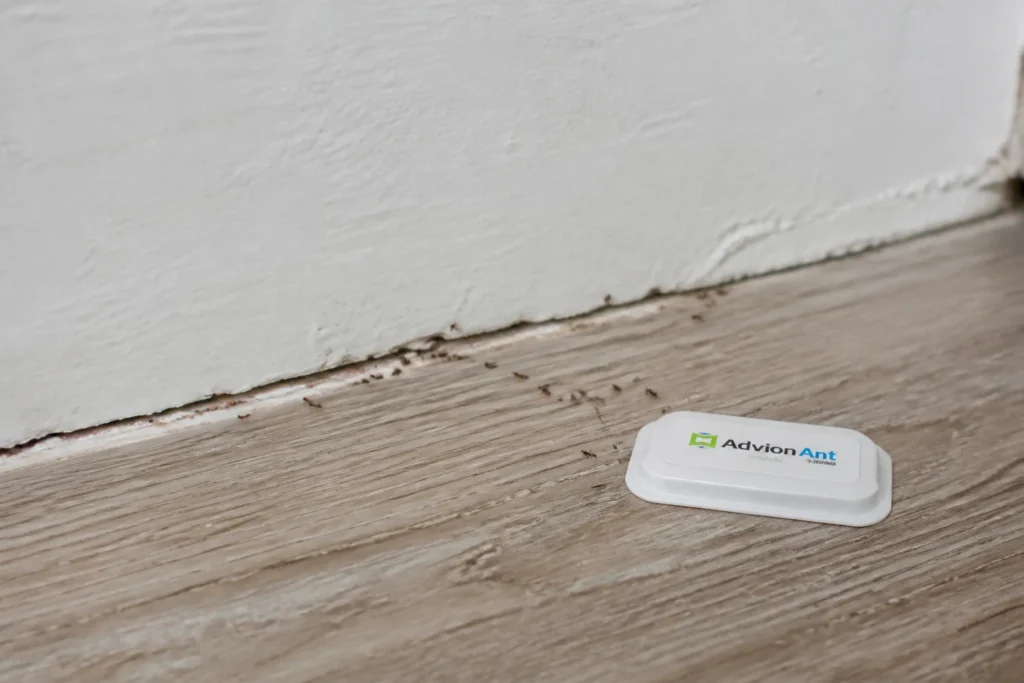
Ant workers may travel along building edges while foraging from elsewhere. Some species nest in voids or damp wood, but the response should follow identification and evidence. Repellent treatments can divide some Pharaoh-ant colonies, so indiscriminate spraying may complicate a concealed problem.

Why are ants coming from the wall?
Inspect the source and route
Foraging route
Workers at a baseboard can come from another location.
Moisture
Accessible leakage may warrant plumbing or building repair.
Wood condition
Suspicious damage needs qualified assessment.
Species and shared spaces
Identification and building coordination shape the plan.
Ways to get rid of ants in walls, ranked by role
Match the method to the finding
Identification and observation
Record recurring locations and obtain an identification.
Accessible moisture repair
Correct the defect found rather than assume the source.
Qualified concealed-nest assessment
Use professional help for voids, wood concerns or persistent activity.
Appropriate treatment and follow-up
Follow a species-specific labeled plan without routine wall injection.
Ant infestation inspection: trails, moisture and food
Document an accessible baseboard route
Use a flashlight from outside the gap and record where ants appear. Do not remove electrical covers, poke into voids or treat an unidentified insect as a confirmed carpenter ant.

Inspect visible sink joints
Check accessible piping for moisture and arrange an appropriate repair. Continued dampness may require a plumber. Do not open a wall merely because a foraging trail crosses it.

Have suspicious wood assessed
Ask a qualified provider to inspect accessible wood below a window if there is damage, frass or repeated activity. A photograph does not establish structural safety or identify every wood-damaging pest.

Reduce accessible food resources
Clean appropriate floor edges and protect stored food. If bait is part of the agreed plan, follow its placement and maintenance directions. Coordinate recurring activity across units with building management.

Monitor ants in your home after source repairs
Use observations rather than a clearance promise
Record
Note recurring routes and obtain identification.
Maintain
Correct the accessible food, moisture or entry defect.
Treat conditionally
Follow the chosen product directions or qualified plan.
Reassess
Compare activity and investigate unresolved sources.
Ant bait and natural remedy myths
Avoid one-size-fits-all ant advice
Myth: baseboard ants prove a nest in that wall
Fact: workers may travel from another source.
Myth: all wood damage is carpenter ants
Fact: obtain identification and a building assessment.
Myth: spraying every gap prevents new colonies
Fact: some species respond poorly to repellent treatment.
Myth: drilling and dusting is routine DIY work
Fact: concealed electrical and structural spaces need qualified assessment.
When to obtain help
Seek a qualified pest-management assessment for recurring concealed activity, suspected carpenter ants or uncertain identification. Ask which species was found, what evidence supports the proposed work and how continuing activity will be checked. A provider should explain preparation and product precautions for the actual site rather than prescribe the same dose or schedule to every household.
Wall activity needs species and route evidence
Ants at one trim joint may be following a food or moisture route; they do not prove that the colony is inside the wall. Sawdust-like material, damaged wood, or activity near plumbing changes the inspection priority.
Use monitors and photographs, correct accessible moisture and food sources, and avoid sealing an active route before identification. Suspected carpenter ants, structural damage, or inaccessible nests warrant professional assessment.
Identify carpenter ants and other species of ants in walls
A line of small black ants doesn’t identify the species. Workers differ in size, waist structure and other features that are hard to see without a clear close photograph or specimen. Avoid crushing an unknown insect between your fingers to diagnose it by smell.
Carpenter ants belong to the genus Camponotus. They excavate wood for nesting rather than eating it like termites. Odorous house ants, Tapinoma sessile, can use wall voids and areas near pipes. Pharaoh ants, Monomorium pharaonis, have different colony behavior and deserve particular care with treatment selection.
Terms such as sugar ants or moisture ants are informal descriptions, not enough to choose a product. Color also doesn’t separate every carpenter ant from other ants. Ask an extension office or pest-management provider for identification when activity persists. The UC IPM ant guide compares common species and food preferences.
Signs of an ant infestation in wall cavities
Ants entering a baseboard seam may be traveling from an outdoor nest or another part of the building. The opening shows a route, not necessarily the colony’s location. Note whether workers go toward food, water or another opening before cleaning the area.
Repeated indoor activity, winged ants or debris beneath trim can strengthen the reason for an inspection, but no single sign identifies every nest. Sawdust-like frass warrants attention to wood-damaging pests. Photograph it before cleanup and ask whether it is consistent with carpenter ants, termites or another cause.
Don’t tap or open drywall to provoke a response. Rustling sounds aren’t a definitive ant test, and a moisture meter reading doesn’t prove a colony is present. Use observations to guide an inspection rather than treating every clue as certainty.
Minnesota Extension’s carpenter-ant guide describes nesting evidence and the difference between foragers and an indoor nest. Structural damage also needs a building assessment, not only pest treatment.
How to get rid of ants in the walls naturally
Remove the food source workers are using
Clean crumbs and sticky residue from suitable surfaces. Keep sugar, flour and pet food in closed containers, and don’t leave pet bowls with food overnight when that is the confirmed attraction. Maintain bins and inspect the cupboard floor rather than cleaning only the visible counter.
Sanitation reduces competing food and makes monitoring easier. It doesn’t reach a queen hidden in a cavity. If ants keep returning to a clean counter, inspect the route and nearby moisture rather than repeatedly adding a stronger cleaner.
Address leaks and condensation
Check accessible sink joints, supply lines and the cabinet floor. Look for damp staining beneath windows or near plumbing, and arrange an appropriate repair. Persistent wet material may need a plumber or building professional even when the surface feels dry.
A dehumidifier can support drying in a suitable space, but it won’t repair a hidden leak. Carpenter-ant nests can involve both damp wood and drier satellite locations. Don’t assume one humidity target or replacing one soft board automatically eliminates the ants.
Clean trails without confusing the treatment plan
An ordinary appropriate surface cleaner can remove food residue and disrupt some scent trails. White vinegar is commonly suggested, but it can damage natural stone and other finishes. Check surface-care instructions and never mix cleaning products.
If a bait program is active, don’t clean through the feeding placement or spray the workers using it. Follow the product or provider’s directions about what to leave undisturbed. Cleaning and baiting have different purposes.
Will essential oils, cinnamon or homemade remedies eliminate ants?
Peppermint oil and other essential oils can have repellent effects in some circumstances, but that doesn’t establish control of ants in wall cavities. Workers can change routes while the nest remains. A cotton ball with oil near a crack is not evidence that the queen has died.
Cinnamon, pepper and coffee grounds are not dependable colony treatments. They also create residue around food and can distract from a leak or open food source. Natural remedies should not be presented as automatically safe to use around pets.
Don’t mix a homemade borax-and-sugar bait and assume the concentration is correct for every ant species. Borax and boric acid aren’t interchangeable names for one household recipe. Choose a labelled bait intended for the insect and location when treatment is needed.
The EPA label guidance explains why product directions govern placement and precautions. No scent mixture substitutes for species identification, moisture repair and follow-up.
How ant baits differ from repellent sprays
A slow-acting ant bait is intended to be collected by feeding workers, with the goal of affecting the colony rather than only killing the ants you see. Its usefulness depends on the species accepting the bait, suitable placement and continued access. One gel is not equally effective for every type of ant.
Food preferences can change. A provider may choose or adjust a bait formulation after identification and observation. Don’t assume all carpenter ants need sweet liquid or that all small ants require protein. Avoid guessing from the color of the workers.
- Choose a product labelled for the ant and indoor or outdoor site.
- Use only permitted placements and amounts.
- Keep bait inaccessible to children and pets.
- Don’t contaminate bait with a cleaner or repellent spray.
- Inspect and maintain it according to its directions.
You may notice ants feeding at a placement. That is different from an unexplained new trail elsewhere. Record both. A fixed three-day colony-collapse promise doesn’t account for inaccessible nests, competing food or bait acceptance.
Contact sprays can kill exposed workers without reaching the nest. Some species, especially Pharaoh ants, can respond to disturbance or unsuitable repellent treatment by splitting colonies. Don’t turn that species-specific concern into a claim that every spray always makes every ant problem worse.
Carpenter ants, wood damage and professional inspection
Suspected carpenter ants need a search for nesting locations and moisture conditions, not just a line of bait along one baseboard. Severe excavation can weaken structural wood. Pest treatment and repairing damaged construction are separate jobs.
Ask the provider what evidence identifies the ants, where nesting is suspected and whether an outdoor parent nest or indoor satellite nest is involved. A good plan explains the inspection limits instead of promising that no wall will ever need access.
Do not remove outlet covers, drill exploratory holes or inject pesticide dust into electrical and plumbing voids as routine DIY work. Concealed utilities and the product’s permitted use must be assessed. Shutting off a breaker does not turn arbitrary wall dusting into a safe method.
Maryland Extension discusses carpenter-ant signs and nesting sites. For other wood-damage questions, compare our termite treatment guide; don’t choose termite treatment solely because you found frass.
Prevent ants from returning through building routes
Once the source and treatment sequence are understood, repair suitable exterior gaps and maintain weather stripping. Use materials appropriate to the joint, preserving drains and ventilation. Closing a visible indoor seam alone can redirect workers without resolving the source.
Check accessible vegetation touching the building and storage against walls. In apartments, utility chases and neighboring units can connect activity. Share the room locations and dates with property management so treatment isn’t limited to one counter while a common source remains.
Keep a simple record: room, route, species if known, food or moisture finding, repair and subsequent observations. Our insect identification guide can help with look-alikes. Compare observations under similar conditions rather than declaring success after one quiet evening.
Frequently asked questions about ants in walls
How can I find an ant nest without damaging the wall?
Record accessible trails and likely food or moisture connections, then obtain identification. An inspection can narrow the search, but visible workers don’t reveal the whole layout. Let a qualified provider decide whether concealed access is necessary rather than drilling at the first crack.
Can ants damage drywall?
Many household ants simply use existing openings. Carpenter ants excavate wood, and other insects or water damage can explain damaged building material. The ant species and the actual material condition must be assessed before deciding what needs repair.
Why are there more ants around the bait?
A feeding group can mean workers have found it, but it doesn’t confirm colony elimination. Follow the directions and avoid spraying the feeding ants. Report persistent new routes, poor feeding or continued activity so the plan can be reassessed.
How long does it take to get rid of ants in walls?
There is no universal clearance time. Species, nest access, bait acceptance, competing resources and shared-building routes matter. Use the product’s instructions and the provider’s follow-up criteria; a calendar deadline isn’t proof that every colony is gone.
Publishing and affiliate notes
Some product links may be affiliate links. If you buy through them, we may earn a commission at no extra cost to you. Product picks are not lab tests. Read the legal disclaimer.