
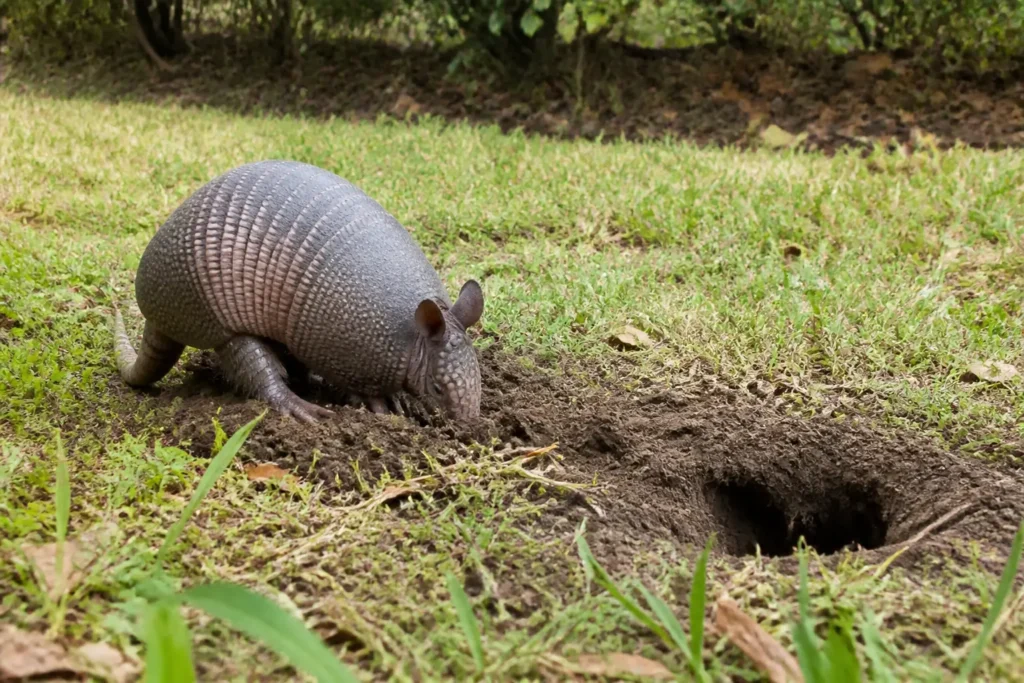
Shallow digging and a larger burrow have different implications, and other animals can produce holes. Record observations and actual damage without reaching into an entrance. A local wildlife provider can advise on feasible barriers, species and lawful control where the conflict persists.

Identification and conditions
Separate shallow digging from a structural concern
Surface disturbance
Record location and pattern rather than assume the species.
Animal evidence
Use safe observations and qualified identification.
Barrier weaknesses
Inspect the protected area’s bottom and gate.
Burrow extent
Concealed occupancy or undermining needs assessment.
Methods ranked by their role
Identify and protect before considering control
Identification
Confirm the likely animal and damage.
Suitable barrier assessment
Protect a limited vulnerable area where feasible.
Qualified burrow assessment
Use help for occupied or structurally sensitive sites.
Lawful site-specific management
Discuss local options and precautions with an experienced provider.
Inspection and prevention steps
Document shallow lawn marks
Photograph ordinary surface damage from a safe place. Do not use hole dimensions alone as a guaranteed identification. Record whether an animal has been observed and where damage continues.

Check barrier ground contact
Inspect an existing suitable fence for bottom weaknesses. Below-ground work requires utility clearance and appropriate design. A generic buried apron dimension does not guarantee exclusion at every site.

Maintain the gate latch
Check closure and gaps when the site is unoccupied. Protecting a vegetable bed is separate from closing an animal den. Do not block an entrance while fitting ordinary garden protection.

Seek local guidance for recurring damage
Ask local extension or a qualified wildlife provider about identification and feasible lawful options. Explain any burrow near a path, slab or foundation. Do not treat silence or undisturbed paper as proof that backfilling is safe.

Sequence and reassessment
Resolve the cause before repairing sensitive damage
Identify
Record the surface pattern and animal evidence.
Protect
Assess practical barriers for a vulnerable area.
Consult
Obtain help for burrows and ongoing conflicts.
Repair
Restore damage when occupancy and structural safety are resolved.
Myths and facts
Avoid unsupported armadillo-control promises
Myth: a hole’s size alone confirms armadillos
Fact: assess several observations.
Myth: castor oil reliably repels them
Fact: do not promise unsupported soil-drench control.
Myth: every yard needs a trap
Fact: consider the conflict, safety and local rules.
Myth: 48 hours of paper proves an empty den
Fact: obtain an appropriate occupancy assessment.
Distinguish feeding marks from structural risk
Shallow conical holes in turf are different from a deep opening beside a slab, wall, or utility. Repairing the surface before activity stops can hide continuing excavation.
Photograph the pattern, check barriers and food attractants, and compare new disturbance. Recurring damage near structures or any capture proposal should be reviewed with local wildlife guidance and a qualified professional.
Is an armadillo digging in your yard?
An armadillo commonly leaves scattered shallow feeding pits as it searches the soil for food. A den entrance is a different feature: a larger opening leading into shelter rather than a small mark made while foraging. Do not use a single hole diameter as proof that the animal is an armadillo.
Look at the pattern across the lawn, nearby disturbed soil and any actual sighting. Record when new damage appears. An outdoor camera aimed at the affected ground can help establish the visitor without entering a burrow or handling wildlife. A photograph of tracks and several holes is more useful than an isolated close-up with no scale.
UF/IFAS describes nine-banded armadillo feeding and burrows. Its regional observations are context, not a universal identification test. Species, soil and local wildlife differ; ask an extension office or wildlife provider if the evidence is unclear.
Compare moles, skunks, gophers and protected wildlife
Raised tunnels, soil mounds, scattered feeding pits and a persistent den opening point to different investigations. Skunks can also dig while feeding, and other mammals may use abandoned cavities. Do not buy an armadillo trap before you know what is causing the marks.
In areas with protected burrowing species, identification is especially important. A burrow potentially occupied by a tortoise or another protected animal is not a lawn defect to fill. Keep equipment away and obtain local wildlife guidance. The fact that an armadillo was once seen nearby does not establish present occupancy.
What attracts armadillos to a lawn?
Armadillos forage for invertebrates such as insects, larvae and earthworms. A lawn with accessible food and suitable soil can attract repeated visits. That does not mean every damaged yard has a turf-grub infestation, and it does not make all soil insects pests that should be eliminated.
Before buying a grub treatment, determine whether damaging grubs are actually present and whether treatment is justified for the turf. Removing every earthworm would not be a sensible yard-management goal. A pesticide intended for lawn insects is not automatically an armadillo repellent.
Review irrigation for leaks, overspray or unnecessary watering. Adjust the system to the needs of the plants and local conditions rather than deliberately drying the entire garden. Keep records of watering and fresh damage so you can distinguish a recurring route from a one-time visit.
Clear clutter where it interferes with inspection, but do not strip the yard of all habitat. The practical aim is to protect the place where damage matters, not to make every outdoor animal leave the property permanently.
Use targeted barriers rather than fencing the whole yard automatically
A vulnerable vegetable bed, new planting or short boundary gap may be easier to protect than an entire property. Choose a durable barrier appropriate to the animal, soil and site. An ordinary loose garden border with an open bottom may not stop a digging animal.
Ground contact matters. Look for washouts, soft soil beneath the mesh and gaps beside posts. If burial or an outward apron is proposed, obtain underground-utility information before excavation and avoid roots, drainage systems and buried services. Do not copy a depth specification without considering the construction and local guidance.
A fence still needs a usable gate. Check the closed gate at ground level, including uneven soil and the latch side. Protect access for people and keep drainage functional. Photograph the finished ground contact and compare it with the same location after rain or mowing.
Do not build a barrier that traps an animal inside a confined area or blocks a known occupied burrow. When shelter is involved, ask a qualified wildlife provider to assess occupancy and lawful exclusion before modifying access. A barrier for a flower bed and exclusion from a structural den are not the same job.
Do castor oil and natural armadillo repellents work?
Castor oil, garlic, cayenne pepper and strong-smelling mixtures are common suggestions for repelling armadillos. Their popularity is not evidence of reliable yard protection. A fragrance may be noticeable to you without keeping a foraging animal away from food.
A homemade castor-oil spray has no dependable universal mixing ratio, reapplication schedule or success rate. If considering a commercial repellent, check its actual target, permitted site and directions. Consider effects on plants, surfaces, children and pets; natural ingredients do not remove those questions.
Ultrasonic devices, lights and sprinklers also should not be described as guaranteed fixes. An animal may approach from a different route or become accustomed to a disturbance. Keep before-and-after observations rather than assuming a quiet evening proves the product worked.
Do not pour bleach, ammonia, fuel or an improvised poison into a hole. Smoke and flooding can injure wildlife and create exposure or property damage. Repellent experiments should never replace identification when a den is near the house.
Live traps and wildlife removal: check the rules first
Trapping is a wildlife-management decision, not simply buying a cage. Local rules can address who may trap, permitted equipment, non-target animals, checking requirements and what happens to the captured animal. A lawful choice in one state is not permission in another.
Do not assume relocation a few miles away is humane or authorized. Suitable habitat, disease concerns, release permissions and survival all matter. Ask the relevant wildlife authority or a licensed provider about the lawful disposition before any trap is set.
A provider should explain how the animal was identified, which route or shelter is involved, how non-target capture will be reduced and how the site will be restored afterward. Avoid signing up for an indefinite trapping service without a damage-prevention plan.
Florida FWC’s relocation guidance illustrates why location-specific rules matter. Consult your own authority rather than applying Florida guidance everywhere. Do not use the article as a permit or as instructions to handle captured wildlife.
How to repair armadillo holes without hiding a bigger problem
Ordinary shallow feeding pits
Once the marks are identified as ordinary surface feeding damage and the immediate area is safe, restore the soil surface using a turf repair suited to the lawn. Avoid leaving small trip hazards beside a path. Match the fill and reseeding approach to the existing soil and grass rather than burying the area under unrelated rubble.
Reinspect the repaired patch. Fresh digging can indicate continuing feeding activity, not a failed grass seed. Keep vulnerable beds protected and monitor the visitor. Photographing the same patch helps show whether repairs are lasting.
Deep openings and damage near structures
A den beside a foundation, retaining wall, driveway or service line deserves qualified assessment. Surface filling can conceal a void without resolving support or occupancy. Keep people and equipment away if the ground appears unstable.
Do not treat a paper placed over an entrance for 24 or 48 hours as definitive proof that every animal has left. Weather, alternate entrances and intermittent use can make a simple test misleading. Ask the wildlife provider how occupancy will be assessed, and obtain building or ground-repair advice where support is in question.
Armadillo hole questions homeowners ask
Will the animal leave when the lawn dries?
Changes in soil conditions can affect feeding, but there is no guaranteed departure time. Use appropriate watering, targeted protection and observations rather than withholding needed water until plants are damaged.
Does every armadillo carry leprosy?
No. CDC discusses a possible association with some armadillos in the southern United States, not a claim that every animal is infected. Avoid handling wild armadillos or disturbed material and consult a clinician about a specific exposure concern. A hole in the lawn alone does not establish an infection risk.
What should a wildlife-removal quote include?
Ask for identification, the scope of lawful removal or exclusion, non-target precautions, follow-up and responsibility for repairing the damage. Clarify whether structural repairs are included or need a separate contractor. Compare the proposed work, not only a promise to catch an animal.
Can I prevent every new armadillo hole?
No method guarantees a permanently armadillo-free yard. Prioritize high-value plantings and access areas, maintain barriers and review new evidence. That produces a manageable maintenance plan rather than repeated whole-yard treatments.
Publishing and affiliate notes
Some product links may be affiliate links. If you buy through them, we may earn a commission at no extra cost to you. Product picks are not lab tests. Read the legal disclaimer.