
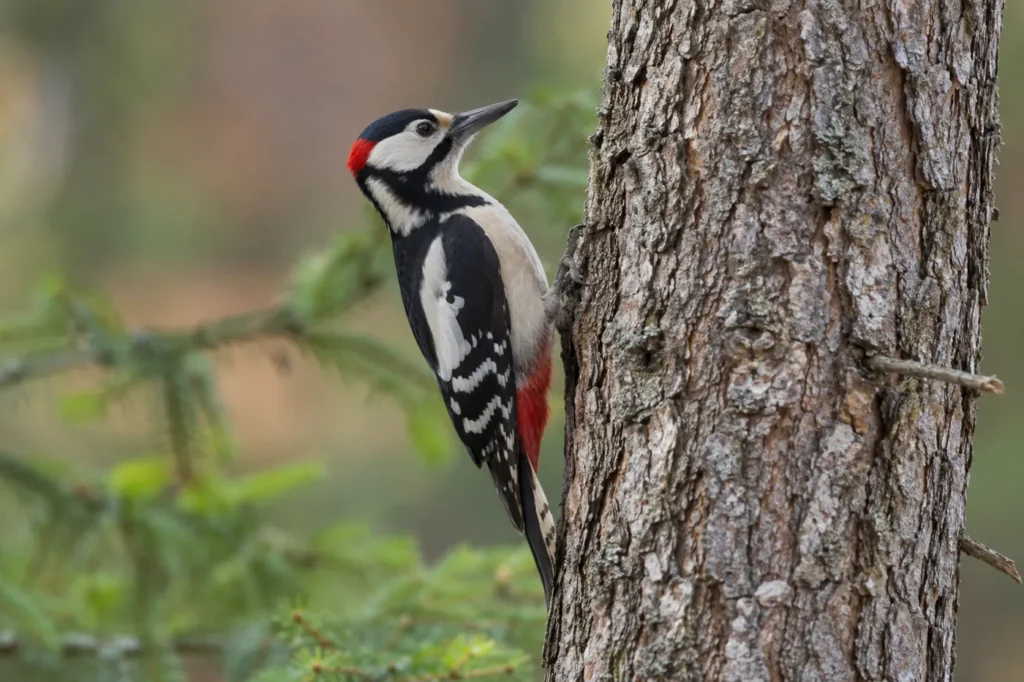
Repeated tapping does not automatically prove a pest infestation or an occupied nest. Different damage patterns can need different assessments. Document the location from the ground and ask appropriate providers about building condition, insects and wildlife requirements before repair.
Identification and conditions
Understand the activity before repairing damage
Drumming
Sound production does not automatically mean insect feeding.
Feeding evidence
Damaged wood may warrant insect inspection.
Excavation
Assess possible occupancy before closing a cavity.
Building condition
Check the actual material damage with suitable help.
Methods ranked by their role
Match deterrence and repair to the cause
Documentation
Record the location and activity safely.
Building or insect assessment
Investigate the cause indicated by the damage.
Appropriate lawful barrier
Use a fitted method without trapping or entangling birds.
Monitoring
Compare recurring activity rather than promise a permanent deterrent.
Inspection and prevention steps
Photograph siding from the ground
Record where damage occurs without climbing or approaching a bird. Describe tapping and observed behaviour, but do not infer a concealed nest or insect problem from sound alone.

Assess a properly fitted barrier
The illustration depicts an unoccupied area. Consult an appropriate installer about clearance, tension and entanglement risks. Do not install loose garden netting or block access to an occupied cavity.

Arrange an accessible wood inspection
Have the appropriate provider inspect for insects, moisture or material damage where indicated. Do not assume every hole is caused by food insects. Work near concealed cavities must account for occupancy and wildlife requirements.

Check official wildlife guidance
Ask the relevant wildlife authority about identification, lawful deterrence and any nest concerns. Explain the species and actual damage. A method lawful for another bird or location is not automatically permitted here.

Sequence and reassessment
Assess cause and occupancy before repair
Record
Document activity and damage.
Inspect
Assess material, insects and possible occupancy.
Respond lawfully
Use suitable deterrence or repair when permitted.
Review
Compare continuing damage and barrier condition.
Myths and facts
Avoid species and permanent-deterrent assumptions
Myth: tapping always proves insects
Fact: drumming and excavation can have other roles.
Myth: reflective tape guarantees permanent avoidance
Fact: monitor the actual response.
Myth: every hole can be sealed immediately
Fact: assess occupancy and protection rules.
Myth: any loose net is a safe barrier
Fact: prevent entanglement and use suitable installation.
Damage pattern changes the response
Small round holes, drumming on metal, and excavation for insects can reflect different behavior. Repairing a surface before understanding the activity can move the bird to another spot or conceal moisture and insect damage.
Observe from the ground, document timing and location, and check current wildlife rules before exclusion. Active nests, unsafe heights, or suspected structural insects call for the appropriate wildlife, building, or pest professional.
How to stop woodpecker damage: identify the reason for pecking
Start with the activity you can observe safely from the ground. Is the bird making a loud repeated sound on metal, searching along damaged wood, or excavating a cavity? The response should fit that behavior. Buying a deterrent before answering this question can leave the real building defect untouched.
Drumming, insect feeding and nest excavation
Drumming is communication and can involve gutters or other resonant surfaces without a food problem. Feeding damage can point toward insects in wood. A cavity may serve as shelter or a nest, so it requires an occupancy check before repair. Cornell describes these separate reasons for woodpeckers hammering houses. Read Cornell Lab’s behavior explanation.
Record the surface, time and location, then photograph fresh changes. Do not assume every hole was made by the same bird or that all tapping proves termites. The woodpecker family, Picidae, includes different species with different habits; identifying the bird and pattern gives a professional more useful information than the noise alone.
Check siding, trim and trees before choosing a deterrent
Separate cosmetic damage from a building concern. Loose siding, a water entry point or weakened trim needs assessment regardless of whether a bird returns. If the bird is feeding around suspected insect galleries, arrange appropriate pest identification. Repairing the visible mark alone may hide the clue without correcting the underlying condition.
- Small repeated holes: document the pattern and check for feeding evidence.
- A larger cavity: leave it open until occupancy and protected-nest concerns are resolved.
- Drumming on metal: inspect the attachment and surface safely; do not remove a functional vent or chimney fitting.
- Tree damage: ask an arborist about tree condition rather than coating bark with household chemicals.
If carpenter-bee galleries are confirmed in the affected wood, use our carpenter-bee guide to distinguish active nest management from preventive repairs. A woodpecker does not prove that bees are present; identification comes first.
Bird netting and barriers: exclusion without entanglement
Physical exclusion can keep a bird from the vulnerable surface. UC IPM describes properly fitted bird netting as a more dependable building-protection method than many scare devices. The installation must prevent access without leaving loose pockets that can trap birds. See UC IPM’s exclusion guidance.
Choose a complete installation, not a hanging strip of mesh
Ask an installer to assess the protected area, attachment points, required separation from the surface and access for maintenance. A partial barrier can simply move pecking to the adjacent exposed wood. Check wind movement, loose edges and the effect on windows, lights, drainage and ventilation before accepting the work.
Keep people safely away from work at height. Two-story eaves are not a suitable place to improvise a ladder arrangement while a bird is nearby. Tell the provider about any occupied cavity before work begins. The contract should describe both safe exclusion and later building repairs, rather than treating them as one automatic step.
Can I patch holes or cover damage with flashing?
Patch suitable defects only after occupancy and wildlife requirements have been checked. Compatible flashing or another protective surface may fit some small damaged areas, but it needs safe attachment and must not interfere with building functions. Inspect the surrounding material too: rotten or damaged backing will not become sound simply because it is hidden.
Reflective tape, owl decoys and chemical repellents
A visual scare device can be tried as a monitored deterrent where it is lawful and safe, but it is not an exclusion barrier. Observe whether new damage actually stops. Do not judge success solely by not seeing the bird during the hours you are home. A stationary plastic owl does not provide ongoing evidence of protection.
Why stronger smells are not the main recommendation
Do not paint homemade mixtures, irritants or pesticides onto a pecking site to drive a protected bird away. Product-use restrictions and the risk of contacting feathers or other animals matter. If insects in wood are a separately confirmed problem, a suitable labeled insect treatment addresses those insects—not the bird’s legal status or a nest cavity.
A sticky material is especially different from a visual deterrent. Avoid anything that can foul feathers or create entanglement. Ask for evidence and label directions before purchasing a marketed bird repellent; the word “humane” on a page does not establish safe use on your particular surface.
Protected nests and lawful timing
In the United States, woodpeckers are protected birds. Do not capture, poison or kill one as a household repair. Active nests and protected species can impose additional restrictions. Federal guidance also distinguishes empty nests from nests containing birds or eggs, and some species’ nests have special protection. Check U.S. Fish and Wildlife Service nest guidance.
Before closing a cavity, ask the responsible wildlife authority or qualified provider what applies to the identified bird and site. State requirements can also matter. A brief period without visible movement does not establish that a cavity is empty. Where birds are occupying the space, protect the surrounding structure without sealing their route until lawful action is established.
Frequently asked questions about woodpecker deterrence
Does tapping mean my house has insects?
Not necessarily. Drumming, feeding and cavity excavation have different purposes. Document the activity and arrange insect inspection where there is evidence, rather than buying a whole-house pesticide treatment on sound alone.
Will a nest box stop damage?
Do not treat an added box or food supply as a guaranteed diversion. Consider the species and behavior with local advice. The practical priority is protecting the affected surface and correcting confirmed building or insect problems.
Should I remove every dead tree nearby?
No. Tree safety and habitat management are separate decisions. Ask an arborist about a hazardous tree, but do not clear useful habitat as a blanket bird-control measure. It may not address the reason for pecking on the house.
What should I ask a bird-control contractor?
Ask how they identified the behavior, checked occupancy, confirmed lawful methods and will avoid entanglement. Request a maintenance and follow-up plan. A proposal to patch every hole immediately without checking for birds needs clarification before work.
Publishing and affiliate notes
Some product links may be affiliate links. If you buy through them, we may earn a commission at no extra cost to you. Product picks are not lab tests. Read the legal disclaimer.