
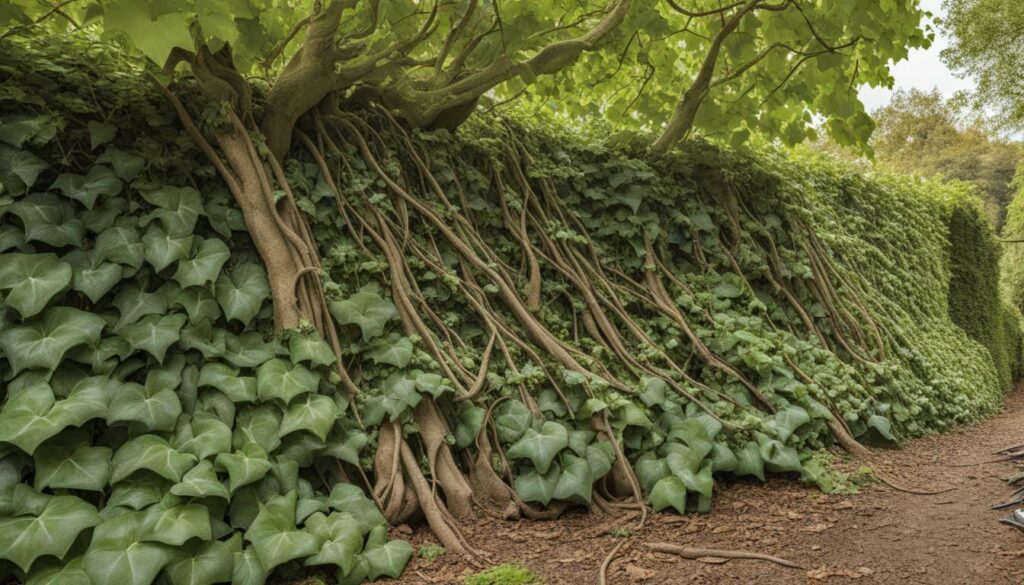
English ivy is invasive in some regions, but the setting matters: ground mats, climbing vines and growth on a building need different work. Established vines can regrow, and disposal must prevent viable material from spreading. Do not promise a single treatment will eradicate every site.

Identify English ivy and its rooted ground cover
Identify the source and conditions
Identification
Confirm ivy rather than a different vine.
Ground growth
Locate manageable stems and rooted growth.
Climbing vines
Inspect accessible stems without climbing.
Regrowth
Plan follow-up and suitable disposal.
Ivy removal methods: choose by site and workload
Choose management for the actual problem
Manageable hand removal
Protect desirable plants and soil.
Careful stem severing
Leave upper tree vines in place.
Label-specific treatment
Consider only appropriate permitted use.
Follow-up
Monitor survivors and new growth.
Cut vines, lift roots and inspect regrowth
Cut accessible ground-level stems carefully
Work from safe footing with suitable gloves and tools. Avoid cutting into tree bark. Stem size and access determine whether qualified help is needed.

Lift manageable ground growth
Remove rooted material in small accessible sections without excessive soil disturbance or injury to desirable plants. Follow local disposal guidance; viable clippings can spread.

Leave severed upper tree vines in place
The illustration shows a small accessible stem, not permission to strip vines from bark or climb. Let upper growth die and seek an arborist for hazardous trees or heavy overhead vines.

Inspect regrowth and disposal areas
Remove manageable new shoots and reassess. If considering herbicide, follow the exact allowed concentration, method and timing. Do not prescribe a universal fifteen-minute application window or assume every foliar treatment fails.

Plan ivy removal and follow-up in stages
A sequence for ongoing management
Identify
Confirm the target and damage.
Prevent
Address the relevant access or growing conditions.
Manage
Use appropriate mechanical or label-permitted methods.
Monitor
Check recurrence and obtain local advice when needed.
English ivy removal myths and facts
Correct common management assumptions
Myth: pull tree vines down immediately
Fact: leave severed upper growth in place.
Myth: one cutting eradicates established ivy
Fact: monitor regrowth.
Myth: one herbicide recipe fits every site
Fact: follow the particular label and restrictions.
Myth: clippings are harmless anywhere
Fact: dispose of viable material appropriately.
Where ivy removal commonly stalls
Cutting climbing stems stops the connection to the roots, but rooted ground runners can survive and send up new growth. Pulling dead upper vines can also tear bark or dislodge material overhead.
Revisit cleared ground and disposal areas during the growing season. If regrowth is extensive, mixed with desirable plants, or attached to an unsafe tree or wall, use an arborist or qualified vegetation professional.
English ivy, ground ivy and poison ivy are different plants
English ivy, Hedera helix, is a woody evergreen vine that creeps over the ground and climbs supports using aerial rootlets. Young leaves are lobed; mature climbing growth can have unlobed leaves and produce flowers and berries. A single leaf shape is not enough to identify every stage.
The phrase “ground ivy” also names creeping Charlie, Glechoma hederacea. This mint-family lawn weed has square stems, opposite scalloped leaves and small purple or blue flowers. It needs a turf-management plan, not instructions for cutting a woody tree vine. UMN’s ground-ivy guidance explains that distinction.
Poison ivy, Toxicodendron radicans, is another plant. Its compound leaves commonly have three leaflets, and contact with its oil can cause a rash. Do not rely on red stems, shiny leaves or a plant-identification app alone. If an unfamiliar vine is mixed through the patch, stop and ask an extension office or qualified provider to identify it before handling.
UMD’s English ivy photographs show how juvenile and mature foliage differ. Don’t restore a planting or choose a herbicide until the target is clear.
Tools for removing ivy roots without tearing up the garden
You don’t need the largest machine for a small patch. Start with gloves, long sleeves, eye protection, suitable footwear, pruning shears and a digging fork or hand tool. Have a tarp or appropriate collection bags ready before cutting. Keep tools sharp and use each within its rated capacity.
- Pruners: cut small runners into sections that are easy to handle.
- Loppers: cut thicker accessible ivy stems, not tree bark or roots.
- Digging fork: loosen rooted growth carefully where underground services and desirable roots are not at risk.
- Rake: collect loose fragments after lifting; it cannot prove every root is gone.
- Tarp: contain cut material rather than dragging it through an untouched bed.
A weed wrench or power tool is not an automatic upgrade. Thick stems against a tree, buried services and unstable footing change the job. Use qualified help when you cannot separate the vine safely from the structure supporting it.
How to remove English ivy ground cover in manageable sections
Choose one patch that you can clear, collect and revisit. Check first for irrigation lines, hidden debris, desirable seedlings and unidentified vines. Start at an accessible edge rather than pulling from the center of a tangled mat.
Cut crossing runners into manageable lengths. Trace each runner to the places where it has rooted and loosen those connections carefully. Roll or lift the freed growth into a mass you can move without strain. If it resists, find the remaining attachment instead of yanking harder.
NC State describes sectioning and rolling ground vines, followed by repeated removal of regrowth. Removing the visible leaves alone leaves surviving roots and stem pieces capable of returning.
Work when soil conditions allow safe lifting without excessive disturbance. Don’t excavate saturated ground simply because it feels softer. Near established shrubs, use smaller hand tools and leave their roots undamaged; an ivy-free bed is not a success if its intended plants are lost.
Can mowing or a tiller finish the job?
Repeated mowing can suppress accessible English ivy, but one pass is not root removal. A mower or string trimmer also needs clear, safe ground and manufacturer-approved use. Avoid blades around unknown vines, stones, wire, exposed roots or steep slopes.
Don’t rototill a mixed ivy bed as a shortcut. Fragmenting and moving rooted material makes follow-up harder, while disturbing soil and nearby roots. Cut and collect the vines deliberately. For a large area, compare staged hand work with a professional vegetation plan before renting equipment.
Ivy on trees, fences and walls needs a different approach
Ground runners and climbing vines are connected, but pulling the whole vine down can damage the surface underneath. For a tree, cut accessible ivy stems without cutting bark, disconnect the lower growth and leave the upper vines to die. Never climb or stand beneath unstable overhead material to finish the removal.
Inspect the trunk from safe ground and ask an arborist about large stems, declining trees or heavy canopy growth. A green ivy canopy can conceal defects; removing it does not repair a damaged tree.
For fences and walls, assess the support before pulling. Old growth may hide loose boards, weak mortar or failing siding. OSU’s landscape-removal guidance notes that an ivy-covered fence can require repair or replacement. A building contractor may be more appropriate than a gardener when the surface itself is unsafe.
When an ivy herbicide can help and what it cannot replace
Chemical control is a legitimate option for some established patches, not something to omit from the comparison. Products containing glyphosate or triclopyr can have ivy uses, but the active ingredient alone does not authorize a particular treatment. Check the current label for the plant, site, application method and exposure precautions.
Foliar treatment and cut-stem treatment are different uses. A product labeled for one is not automatically labeled for the other. Protect neighboring plants and water, observe weather restrictions and keep people and pets out for the specified period. Use a qualified applicator for large stands or sensitive sites.
NC State’s research shows that growth stage, formulation and application conditions affect results. Retail products under a familiar brand can change ingredients. Do not copy a universal dilution, add household detergent as a surfactant or assume a fast brown leaf means the root system is dead.
Why vinegar and homemade mixtures aren’t the default
Acetic acid is a contact herbicide: it damages tissue it touches rather than moving throughout the plant. NPIC explains both that limitation and concentrated vinegar’s eye and skin hazards. A household vinegar recipe is not a dependable treatment for an established ivy root system.
Skip salt, bleach and improvised mixtures around desirable plants. “Natural” is not a safety assessment, and scorched leaves don’t establish lasting control. If you want a nonchemical approach, use removal and follow-up rather than replacing a labeled treatment with an untested recipe.
Disposal, replacement plants and regrowth checks
Keep cut runners and roots contained while you work. Viable fragments left against soil can establish new growth. Check the local waste facility before loading: accepted green waste and invasive-plant rules vary. Don’t dump ivy along a woodland edge or in another garden.
Home composting is a poor default for viable ivy. An approved municipal processing facility is different from a cool garden pile. Follow its collection rules, clean fragments from tools and boots and check the temporary collection area afterward.
Plan what will hold the cleared soil before opening a large patch on a slope. Mulch and site-appropriate replacement plants can help protect ground, but they do not eliminate established survivors. Choose plants suited to your local shade, moisture and restoration goals; a vigorous invasive substitute recreates the problem.
Mark the cleared boundary and keep dated photographs. Revisit during active growth to lift small rooted shoots before they reconnect into a mat. A new shoot can come from a missed fragment or seed, so inspect both the cleared area and its edges. Plan repeated maintenance rather than a one-week eradication deadline.
Frequently asked questions about removing ivy from the ground
Will cutting ivy at ground level kill everything?
It disconnects a climbing stem, but rooted runners on the ground can survive. Remove manageable ground growth and keep checking for new shoots. Dead upper tree vines should remain in place unless a qualified arborist identifies a safe reason to remove them.
Can I lay sod over the remaining ivy?
Don’t treat sod as a substitute for clearing rooted growth. It can hide surviving runners and make later removal disruptive. Prepare the site, check for regrowth and select a ground cover appropriate to its light and soil.
How long does it take to remove a large area?
Access, stem thickness, neighboring plants, disposal and follow-up drive the workload. Test a small section and measure your actual progress before setting a schedule. Ask a contractor to separate initial clearance, surface repairs and return visits in the quote.
When is professional ivy removal worthwhile?
Use help for unsafe trees, buildings, extensive slopes, uncertain plant identification or a treatment beyond your competence. Ask who handles disposal, restores exposed ground and checks regrowth. A quote promising permanent removal after one cutting deserves questions.
Publishing and affiliate notes
Some product links may be affiliate links. If you buy through them, we may earn a commission at no extra cost to you. Product picks are not lab tests. Read the legal disclaimer.